Today, we're going to continue our walkthrough of the "Classifying_Iris" template provided as part of the AML Workbench. Previously, we've look at
Getting Started,
Utilizing Different Environments and
Built-In Data Sources. In this post, we're going to focus on the built-in data preparation options that the AML Workbench provides.
 |
| Prepare Data |
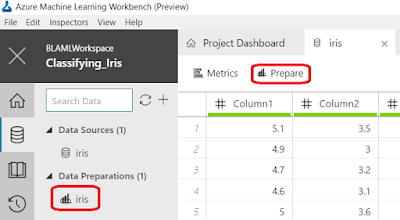
Let's start by navigating over to the "Data" pane and select the "Iris" Data Source. From here, we have two options. First, we could use an existing Data Preparation by selecting it from the "Data Preparations" list in the "Data" pane. We also have the option of selecting the "Prepare" option at the top of "iris" tab. This option will allow us to start from scratch. Let's go with the second option for now.
 |
| Prepare |
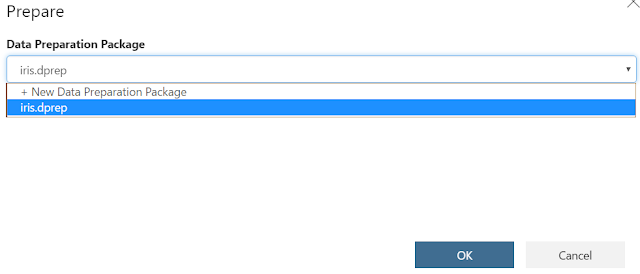
In the "Prepare" window, we need to choose with "Data Preparation Package" we want to use. Basically, a Data Preparation Package is a grouping of transformations that are run as a unit. This package will import all of the necessary data and run any number of transformations on any number of data sources, with only a single line of code.
 |
| Data Preparation |
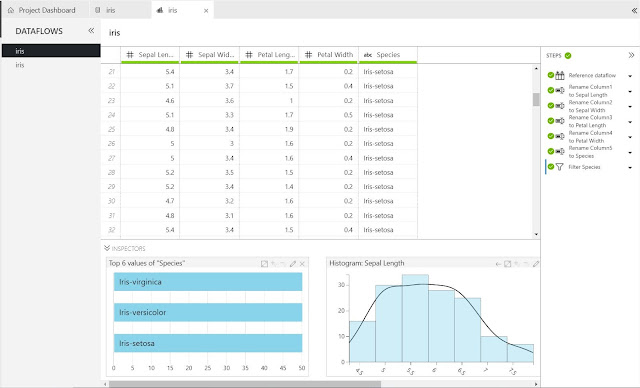
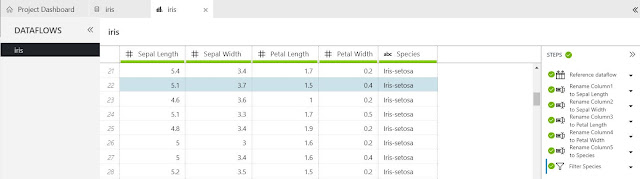
If we choose to use the existing iris.dprep package, we end up with a new tab that looks very similar to the Data Source tab, with a few additions. On the left side of the tab, we have the "Dataflows" pane. A Dataflow is a set of transformations performed on a single Data Source. On the right side of the tab, we see the "Steps" pane. A Step is a single transformation. Therefore, we can see that multiple Steps are grouped into a single Dataflow and multiple Dataflows are grouped into a single Data Preparation Package.
Some of you may have noticed something strange about the table in the middle of the tab. The columns suddenly have names, despite us never having supplied them. We can even see these steps reflected in the "Steps" pane. This is because we aren't looking at the Dataflow we just created. Instead, we are looking at the existing Dataflow. Our Dataflow is the second one on the list, with the identical name.
 |
| Empty Dataflow |
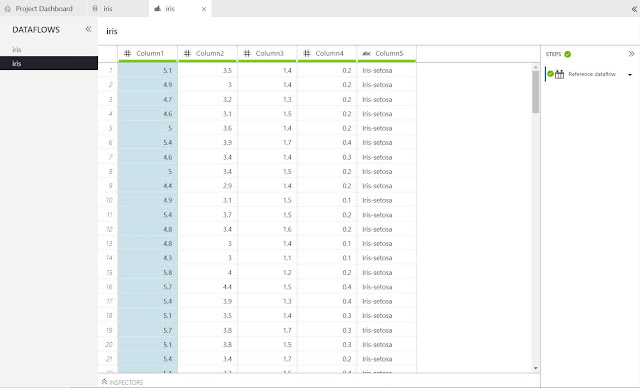
If we select the second Dataflow in the "Dataflows" pane, we find our empty Dataflow. In most cases, it's not very useful to have two different sets of transformations using the same data. So, we'll throw away this Dataflow and use the one that's been provided to us. However, it is important to note that it is possible to use the same Data Source multiple times within the same Data Preparation Package.
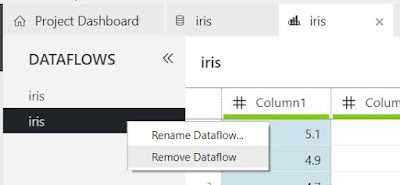 |
| Remove Dataflow |
Let's take a look at the existing Dataflow again.
 |
| Existing Dataflow |
 |
| Steps Pane |
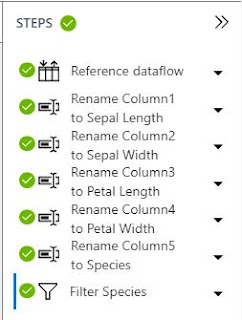
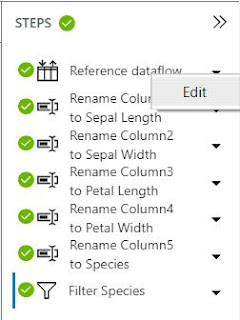
The "Steps" pane shows us that three sets of transformation have been applied in this Dataflow. First, the Dataflow was created. Then, the column names were added since they did not exist in the original csv. Finally, the Dataflow was filtered based on the "Species" column. We can edit any of these steps by selecting the arrow next to them, then selecting "Edit".
 |
| Edit |
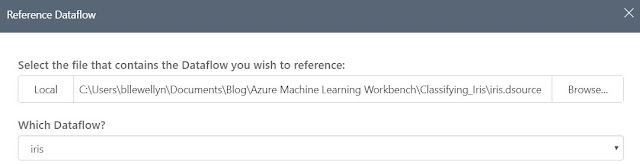 |
| Reference Dataflow |
 |
| Rename Column |
 |
| Filter Column |
We can use these windows to see exactly what each step is doing and make any changes if we would like.
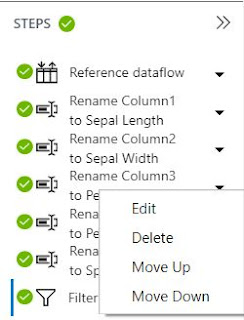 |
| Step Options |
Outside of editing the individual step, we also have the option of moving the step up or down in the Dataflow or deleting it entirely. It's important to note that modifying steps further back in the Dataflow could potentially break steps that occur after it. For instance, assume we are using column "A" in the calculation of column "B", then deleting column "A". If we were to move the delete step before the calculation step, then the calculation of column "B" would break because column "A" no longer exists.
 |
| Halfway Complete |
Another very important thing to notice about the "Steps" pane is that we can choose to look at the Dataflow after ANY number of steps. For instance, if we select the "Rename Column3 to Petal Length" step, we can see the Dataflow as it looked after that step. Notice that Column4 and Column5 have not been renamed yet. Using this technique, we can add a new Step at this point, thereby adding it to the middle of the existing Dataflow. This can be useful if we find that we missed a transformation along the line.
 |
| Inspectors |
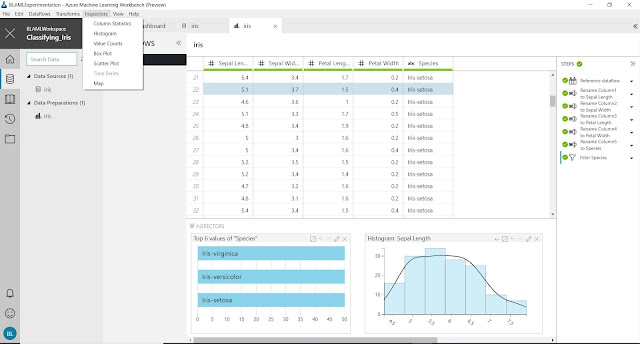
Let's finish by talking about "Inspectors". Inspectors are nothing more than charts that give us a live view of our Dataflow. We can see that we have a few different options to choose from. More importantly, Inspectors are completely independent of Steps. This means that we can create an Inspector to look at our data, then see how that particular data point changes with each step. For instance, we have an Inspector that shows us the "Top 6 values of 'Species'". If we move back to a step before the column "Species" existed, we see that this Inspector is no longer valid. Obviously, this could be extremely helpful at examining the impact of certain filters or calculations.
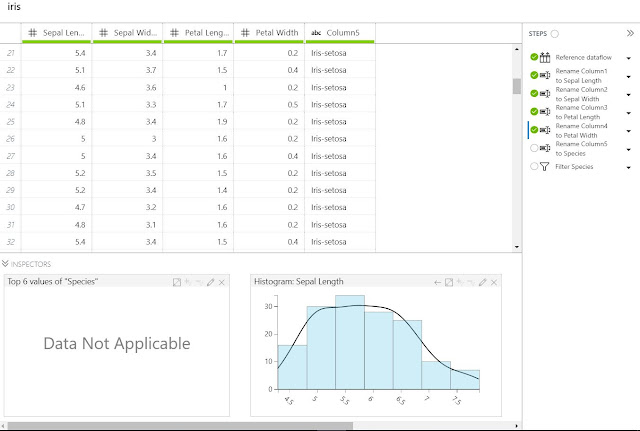 |
| No Species |
There's way more to cover here than we have time for in this post. Hopefully, this post opened your eyes to how easy it is to use the Built-In Data Preparation options in the Azure Machine Learning Workbench. If you're eager to see more about Data Preparation in AML Workbench, read
this. Stay tuned for the next post where we'll be walking through some of the transformation options available in this extremely powerful tool. Thanks for reading. We hope you found this informative.
Brad Llewellyn
Senior Analytics Associate - Data Science
Syntelli Solutions
@BreakingBI
www.linkedin.com/in/bradllewellyn
llewellyn.wb@gmail.com


